Saturday, July 18, 2015

Perdita vs. Ramos - Part 1


I got the chance to play an actual game of Malifaux on Monday at Battleground Games.  
Rather than a play-by-play, I wanted to take a look at the effect decisions made during the Set-up had on the following 5 turns of the game.  Part 1 will have Steps 1-5; part 2 will have steps 6-8.


Standard Set-up

1.  Define & Place Terrain:  The table was a desert outpost. There were three small buildings, 1 medium building, one forest, Ht 1, Climbable stone walls that provide Hard Cover,  1 large Severe Terrain patch at the center of the table with 3 cacti that are Hazardous but also give Soft Cover.  From the Deployemnt area to the center of the table there are lots of Ht 2 Blocking, Impassable Rock Outcrops that also provide Hard Cover. Shooting can be really dangerous in Malifaux, so lots of cover and Blocking terrain is essential to keep the game fun for both sides.

2.  Determine Encounter size:  35 Soulstones.  Not really ready for 50 Soulstone games at this point.

3.  Announce Factions:  I declared Guild.  I had brought Seamus, Perdita, Lady Justice, and Sonnia, so I had the most choice with Masters under Guild.  Daniel declared Arcanists.  I am glad I did not pick Seamus who has limited influence on Rasputina and Ramos crews, one of which was certain to appear on the other side of the table.

4.  Determine Deployment: Daniel flipped for Deployment zone and he seems to always flip Flank.  This is definitely the hardest deployment for some reason.  Even with Nino having From The Shadows, I still felt like my Deployment was not going to be advantageous.  The L-shaped deployment always makes me feel like I am going to get crowded too fast.  I had initially thought I was going with Sonnia, but my fear of getting jammed moved her to 3rd place with Lady Justice moving to the top spot. 

5.  Determine Strategy & Scheme:  Squatter's Rights was the Strategy flipped.  Lady Justice still on top, but uncertain of the crew I would take with her that could hold the center well.
The Schemes flipped were Breakthrough, Distract, Murder Protégé, Power Ritual, and the ubiquitous Line in the Sand.  The Arcanists also had their Faction-specific Scheme, Gathering Power.  I would have like the Guild Scheme, Roundup, but I had left my card at home.  So, now we have only one combat-based scheme and the rest are all about getting to the Center or beyond and holding territory.  Guild Hounds?  Brutal Effigy?  Francisco and Santiago tag-team?  This looks like the heart of my team because those 5 models could handle any of those schemes. Even if I chose my Master poorly, this crew could still pull it off themselves.  I am starting to consider Perdita .......

To be continued......


Thursday, July 16, 2015

Buildings

Slowly, but surely, I am getting to posting pictures of my numerous Works In Progress.  You will see that I jump around a lot! 

I am thinking of just editing some of my WIP posts instead of creating new ones each time I have completed a step just to keep things tidy and centralized.  I will play around with it and see what works.

 Malifaux is blends multiple landscapes as well as multiple genres.  Right now, I have gravitated towards creating desert environments for my demo games at Battleground Games.  So, I have decided to make some buildings that fit that environment.  I am thinking mining camp and early structures in a Boomtown.  These buildings can be later repurposed as bayou buildings with a branching out to a swamp environment.  Some may even work in a Victorian city setting if I make them storage sheds or even worker-class hovels.

Small Dwelling or Storage Shed.   I made two roofs for it: one moss-covered for swamp environments and a wood roof for my desert table.  The varnish is really shiny on the roof for some reason, so I am thinking of ways to dull it or refinish it.


Frontier Jail - I added a flat roof that could bear a second-story addition and it also allows characters to maneuver around on top.  I am planning on adding a floor and interior features, possibly modular features to switch between Bank and Jail - to think of a few.


More buildings to come!

Sunday, July 12, 2015

Learning Malifaux - Game A

I wanted to spend some time exploring  how I introduce players to Malifaux. 
When I run demonstrations, I like to run three games of growing complexity which I will refer to as:  Game A, Game B, and Game C.  I have found this method is ideal for all skill levels and comfort with miniatures games. 

Ideally, I will have the opportunity to play all three games with the new player either in one day or over the course of several meet-ups.  Sometimes,  you get only one game to hook them (or lose them) and you choose the game that best fits where they are in skill and comfort with miniature games.  Game A is best for those that never played Malifaux;  Game B is for those who have played Malifaux, remember some of the rules, but it has been awhile or played prior to 2e ; Game C is for those who have played 1 or more Henchmen games in 2e and want to advance to larger, more complex games.  Game B may even be for some advance wargamers who do not mind the complexity and challenge of learning a lot of new rules at once, but I do not recommend higher than Game B for the first play-through.


In this entry I will talk a little more about what GAME A looks like and the purpose of the game.

Crew:

No Masters; Henchmen as Leaders.
Minions only; no Enforcers, Peons, or Totems.
15 Soulstone crew size
No Upgrades 

Terrain:         

I want enough terrain to cover 1/4 - 1/3 of the 3'x3' table.  Malifaux thrives on terrain but I do not want too much for the first game because I want lots of movement and interactions.  I want to place terrain features that will demonstrate Severe, Blocking (Ht 1 and Ht2), Dense Hard Cover, Soft Cover, Hazardous, and Climbable.  To meet these demands, my table usually consists of: 1-2 buildings, 1-2 forest, 1-2 rocky hills, 1-3 walls, water feature or rocky patch of earth, and 1-4 rock outcrops/statues/pillars/pile that are Ht1 and/or Ht2.  Eventually you will want terrain that looks somewhat natural, but proxy whatever you can if you do not have scale terrain built.  Soda cans can be wrapped in foil to create rock columns, felt or construction paper can simulate forests and water features, books can stand in for rocky hills that can be climbed. 
Who to Use:                       

I recommend Samael Hopkins and 3 Witchling Stalkers for one of the crews.  There are enough Conditions and Triggers in this crew as well as synergy present in this line-up without being overly complicated.  Also, Samael ignores Severe Terrain while the Witchlings do not - this will allow the new player to acclimate to the terrain rules in Malifaux and see the advantages that Abilities like Unimpeded bestow.  Other good Henchmen/Minion crews I currently consider:
The Judge w/ 2 Guild Marshals
Barbaros w/ 3 Terror Tots
Viktoria of Blood w/ 2 Ronin

For the second crew, I select a crew that has Terrifying in it so the new player can see how Horror duels work and how they affect the game.  This may be Bad Juju or Madame Sybelle as the Henchmen.  I do like Madame Sybelle for demos because she introduces the  Terrifying and Hard to Wound abilities, auras, Blasts, and (0) Actions.  This is match-up is great because the other crew will likely not have some of these Abilities and Actions so the new player gets a taste of many different Abilities and Actions without being responsible of keeping track of every one.
  Henchmen/Minion crews suggestions for the second crew:
Madame Sybelle w/ 3 Rotten Belles
Bad Juju w/ 2 Silurid
Valedictorian w/ 3 Crooked Men
Hungering Darkness w/ 2 Illuminated

These suggestion only consider currently available models.  I look forward to future releases that will make models like the Spawn Mother and Gupps available which will be a great way to introduce summoning in Game A without being over-powering.  The goal is to ideally create an even match with contrasting abilities.

Goals & Length:

By the end of Game A, the initiate should be comfortable with reading the stat cards and knowing what everything means or at least knowing where to look in the rulebook for it.  They will have plenty of practice moving their models, using AP, flipping duels, and keeping track of VP.  You will also review Conditions, Negative/Positive Flips, and using Soulstones.  To keep things simple, but still exciting, I go with this game set-up:

Strategy: Turf War
Schemes: None
Turns: 5 - Locked

The game will last only 5 turns, but I include an explanation of how additional turns could result with the card flip at the end of the 5th turn.  I will also discuss schemes at the end of the game and show examples of how the game would have played differently if schemes were involved.
The strategy Turf War is great because it is a simple Strategy to grasp that does not emphasize  just killing other models; also,  it forces the models to the center of the table.  Forcing the models to the center of the table will allow plenty of  terrain interaction. A Strategy not emphasizing killing will still allow plenty combat and engagement but will allow me to demonstrate the importance of using AP towards earning Victory Points over risking models to get a kill.  This also allows discussion of models' strengths,  for example: Bad Juju is great in combat, but the Silurid are too expensive for combat and serve better earning VP's. It is the job of the demonstrator to keep the game going for as long of the 5 turns as possible; bad decisions should be discussed but not exploited. 


In our next installment we will discuss Game B.  Let me know if you have any questions about Game A or if there is anything you wish included in my discussion of Game B.


Happy Days Gaming!

Monday, July 6, 2015

Desert Terrain Pieces


Here are some of the terrain pieces on their own.  Some are in various stages of completion, but all are functional and are being used in games and demonstrations.  You can refer to the earlier post to see examples of what they look like together on a table.  They look good with or without a gaming map.  I did create a desert sand & dirt gaming mat just for Malifaux (it is big enough so I also can use it for WarmaHorde games).  Below I will give a brief comment on how I use each piece on the table for games/demos.


Pond:  Severe only
Walls:  Ht 1 Blocking, Climbable (costs 2" of movement), Hard Cover


Trees: These trees have their own amorphous bases that sit on top of some sand/dirt/grass templates to determine the area of the forest  (3rd photo, below trees and cacti, are examples of such templates)
Forest are Ht 5 Blocking, Severe, Soft Cover,
Cacti:  These can sit on top of sand/dirt/grass templates to simulate a patch of cacti that be determined as Impassable or Hazardous.  They can be placed on top of 30 mm bases or just on their washer based to create a single Hazardous piece of terrain.
Sand patch:  Can be left bare to be just Severe Terrain; place trees or other flora to create various forest terrains.


Outcrops:  The first two outcrops are small, about 4" - 7" across.  They are Ht 2 Blocking, Hard Cover.  They are stable enough to be Climbable, but I usually treat them as Impassable to encourage flanking and making hard choices (bottleneck or spread out).  The third outcrop is much larger and is definitely Climbable. There are two levels on each.  The second level provides a Vantage point.


Sunday, July 5, 2015

Desert Terrain Tables

Although I am moving towards a focus on the Resurrectionst, I decided on creating several pieces of modular terrain that will create a desert theme.  I imagine the possibility of outposts, mining camps, mines, and boomtowns.  Here are some pictures of  the table set-ups I have used for demonstrations .   The first two pictures also feature the gaming mat I made to simulate the dirt and sand of the American West.  The third picture has a piece of orange cloth as the mat that can purchased at any fabric store or even some Wal-Marts. 

I am really enjoying the desert theme; each of these tables has every type of terrain trait in Malifaux and it is a great training ground to learn the rules on.   Also, they bring back a lot of memories from my childhood growing up in California and visiting my Grandfather in Arizona.  I hated the heat of the Southwest deserts, but those deserts were beautiful beyond belief even in their stark simplicity.  I think they would have been even more awesome with giant lizardmen, evil puppets, ice constructs, and witchlings running around!


 My next post with have close-ups of terrain pieces.

Saturday, July 4, 2015

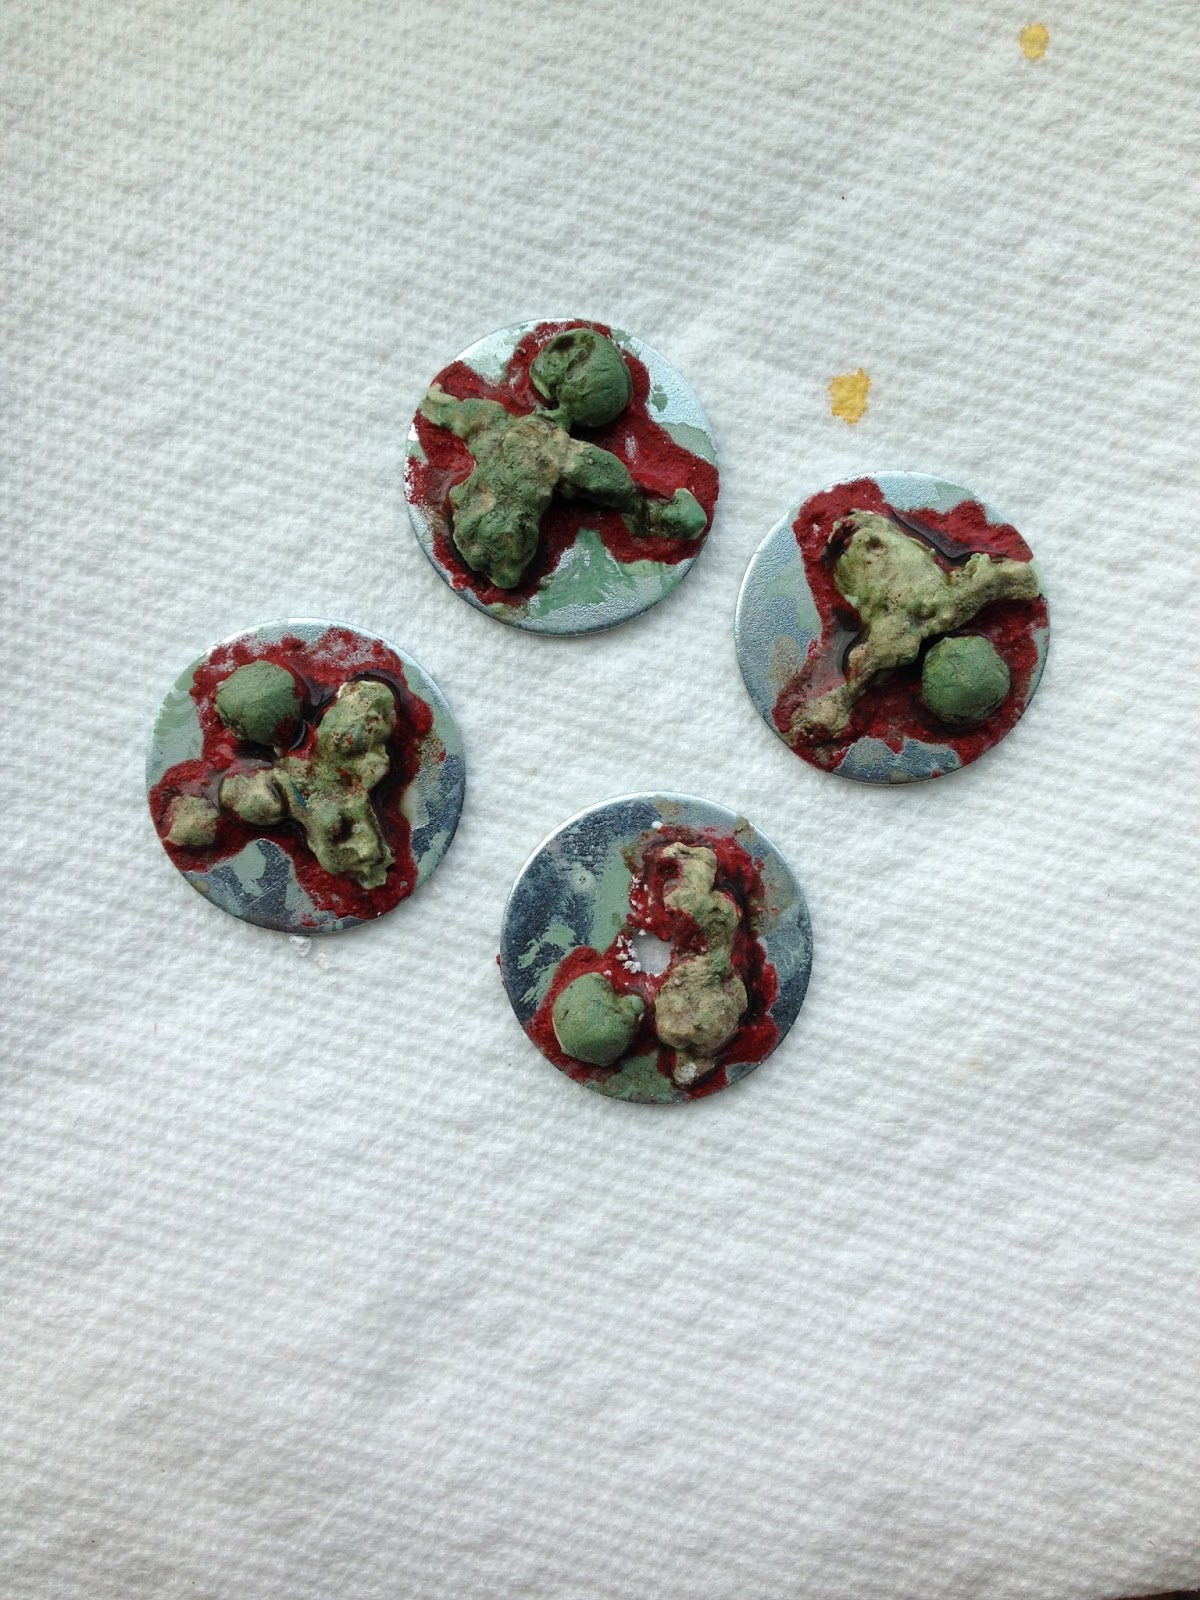
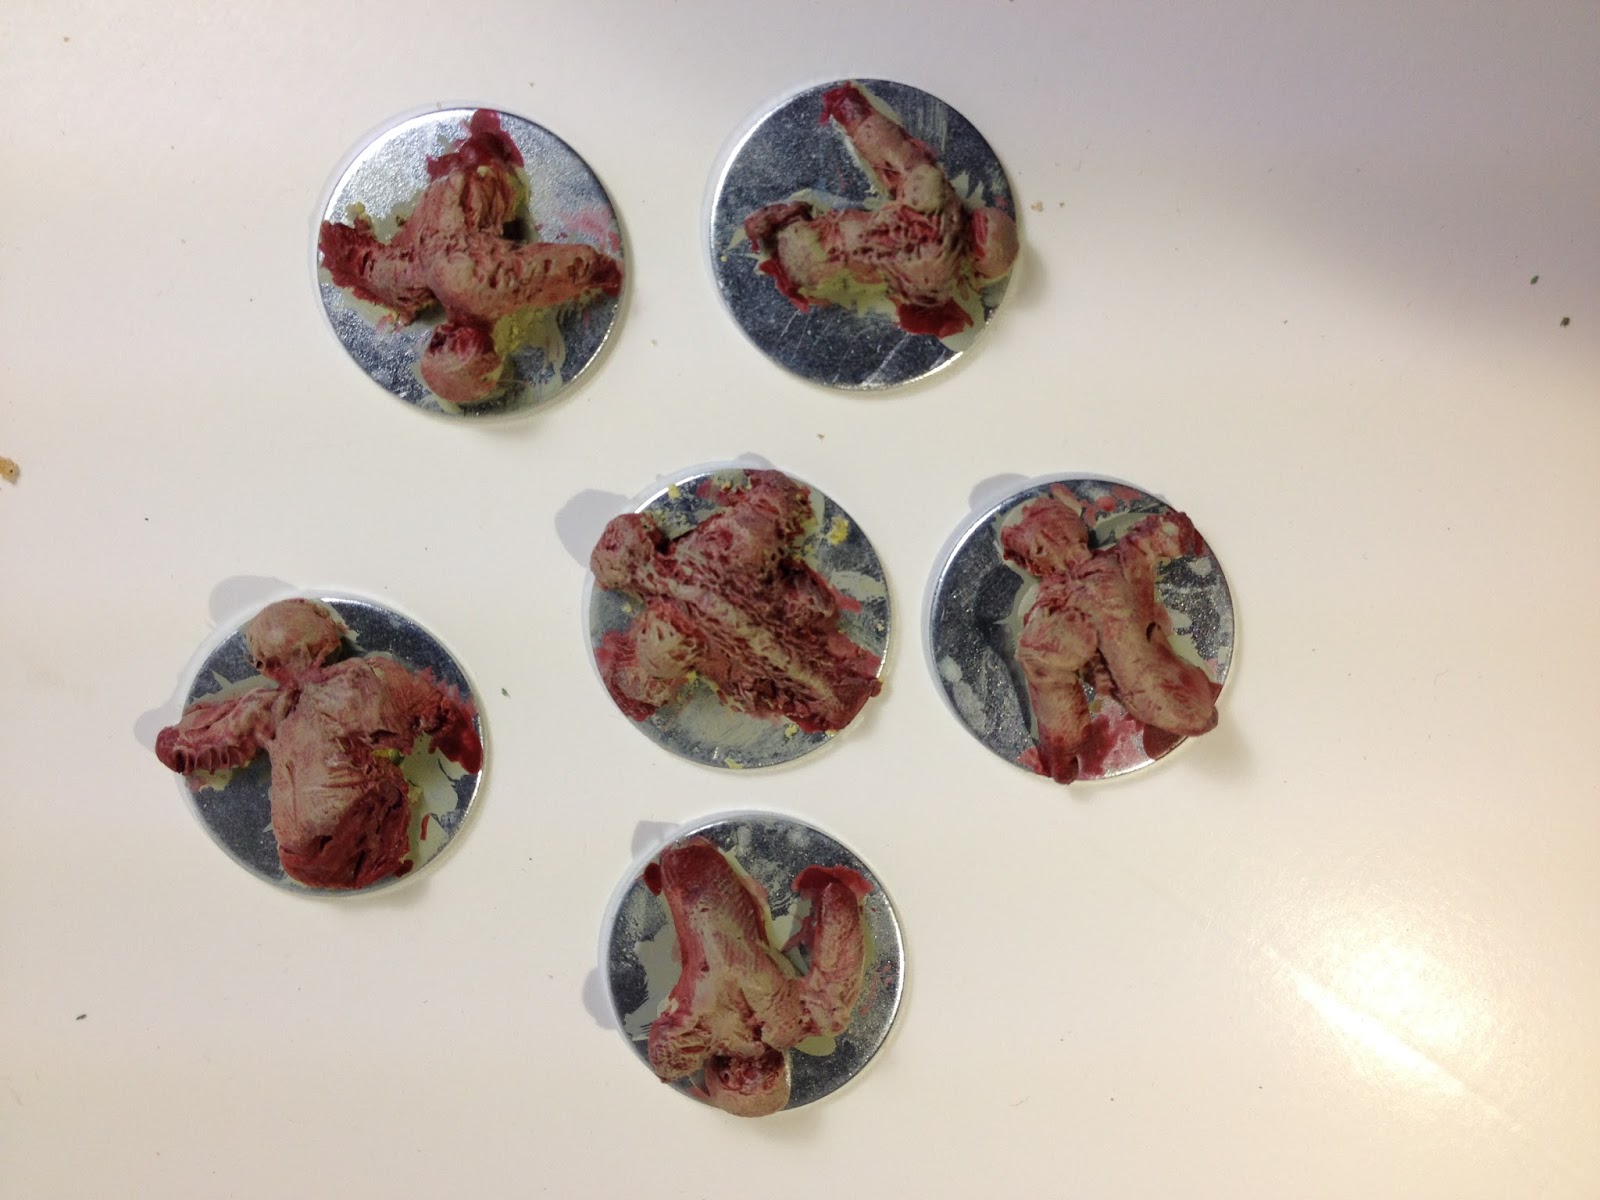
Update: Corpse Markers

Some more progress with my first batch of Corpse Markers!  

I have pretty much finished with my initial six markers and I am very pleased with them.  I may go in later and add tiny details, but their look will not change from this:


For my next set I attempted a smaller batch of 4 markers.  I decided to experiment with spackle paste as a potentially faster, easier medium considering Milliput has to be mixed and then it will set in a short time, so what is mixed has to be used which leads to procrastination until I have side projects ready to accept the inevitable surplus of Milliput I mix.

Skeleton - again, balsa wood and wood glue attached to metal washers


Fleshing out - layers of spackle paste.  Each layer dries in less than an hour and really easy scrape and carve after it dries.

Glue/paint - this was different than the  others.  The spackle paste felt much more fragile than the Milliput so I am nervous about it breaking off.  I made a sludge of wood glue and paint and edged the sculpts with it to create a solid base that might strengthen the marker once set.
 

I wanted these models to look dug-up so I could use them with my Resurrectionists, especially the ever-loving Canine Remains, so I used some coffee grounds  and glue to cover the washer and partially the models.  They are drying right now, but they will just get a brown/green wash again and maybe a beige dry brush just to the two highest points on each marker.

Wednesday, July 1, 2015

Corpse Markers

I am currently working on a series of posts concerning running demonstrations, but it is taking me longer than I had originally planned. 

For now, to keep the blog-blood flowing, I am posting WIP pictures of some corpse markers I am working on.  I have gotten as far as the base coat and the first wash of six tokens.  I still need to work on the detail painting and filling in the bases to increase the contrast and conceal the metal.  If all goes well, I will be making 12 total.


Skeletons - made from balsa wood and wood-glued to metal washers :


Fleshing out the skeletons:  pictured are all Milliput sculpts, but you can use anything that air-hardens.


Base coat and wash:


More pictures to come of these as well as some Wild West/Mining Camp buildings I am working on.
Also coming in July are some discussions on how I like to run demonstrations and maybe a bat rep or two!